
Welcome to part 3 of my journey in exploring Wazuh. In my previous blogs, I introduced Wazuh and its capabilities then walked through how easily it can be installed and configured. Now in this part, it’s time to deploy agents and start monitoring.
Deploying Wazuh Agents
For this blog, I will be deploying agents in an Ubuntu machine and a Windows machine. Since I haven’t created a Windows machine, I will start with it first. Credit goes to Eric Capuano for the step-by-step guide on how I setup my Windows environment. I followed his guide up to this step: “Prevent the VM from going into standby“.
Creating a Windows VM
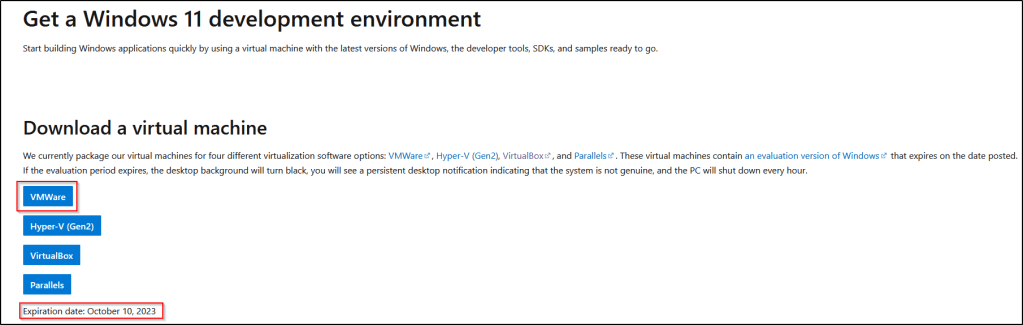
Download and deploy a free Windows VM directly from Microsoft.
- Get the “VMware” version of the workstation.
- Take notice of the “Expiration date” of the VM, it will stop working after this date, but a new one can always be downloaded.
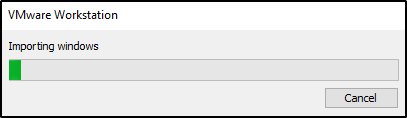
- Once downloaded, unzip the VM and double-click the
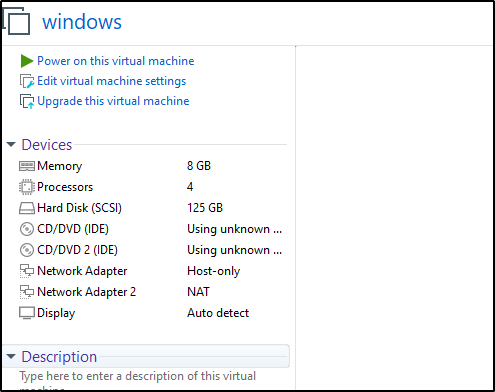
WinDev####Eval.ovffile to import the VM into VMware, but do not start it up yet. - Once imported, if the RAM in the system is 16GB, modify the amount of RAM allocated to the Windows system — it has 8GB by default but can run with 4GB. If the VMs run slow, it may be due to not enough free RAM on the host.
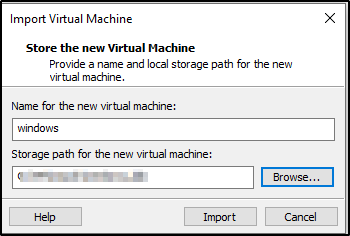
Name the Windows virtual machine and select a storage path for it.
I powered on the Windows VM for the first time and I was automatically logged as “user”.

Disable Defender on Windows VM
Permanently disable Microsoft Defender so it doesn’t interfere with the test to be performed later on. I follow ALL of the instructions as he said in exact order below.
Disable Tamper Protection
- Click the “Start” menu icon
- Click “Settings”
- Click “Privacy & security” on the left
- Click “Windows Security”
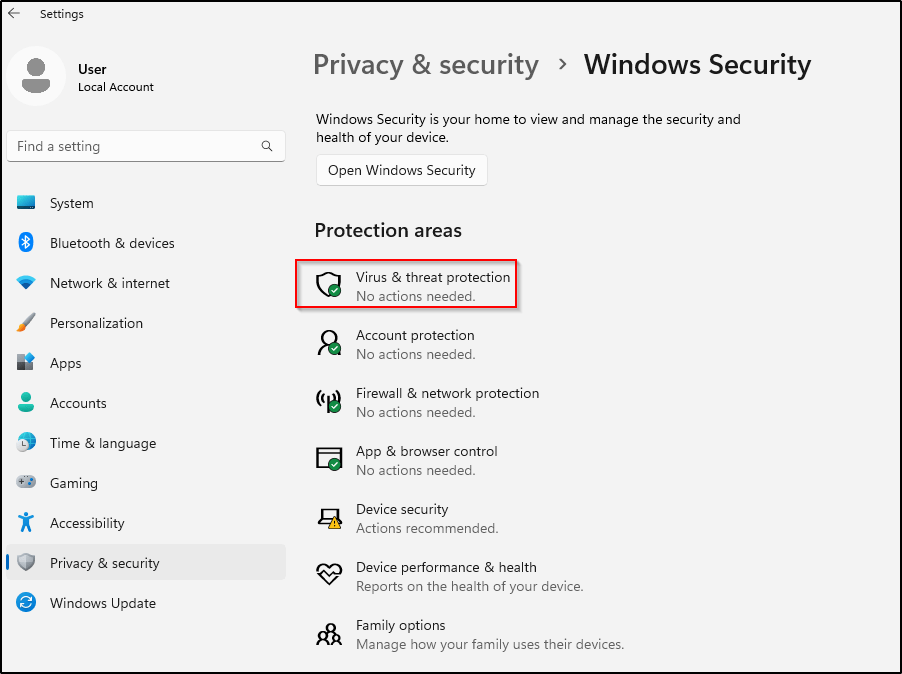
- Click “Virus & threat protection”
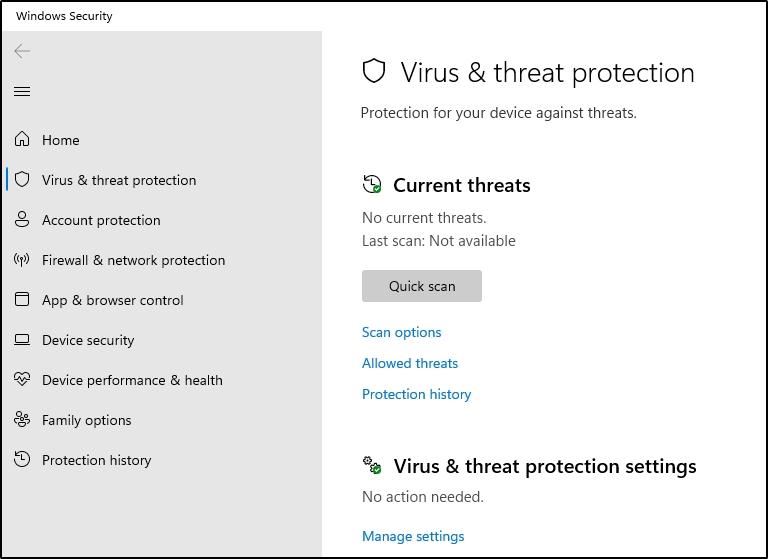
- Under “Virus & threat protection settings” click “Manage settings”
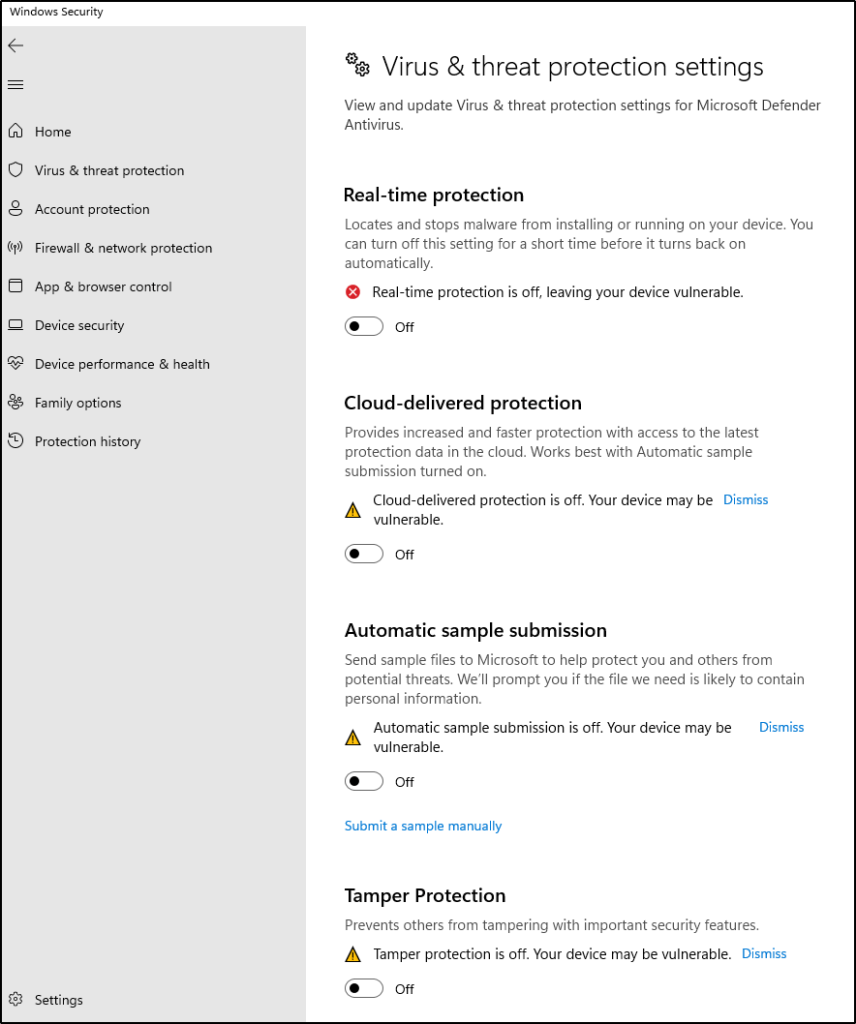
- Toggle OFF the “Tamper Protection” switch. When prompted, click “Yes”
- While in there, toggle every other option OFF as well.
- Close the windows we just opened.
Permanently Disable Defender via Group Policy Editor
- Click the “Start” menu icon
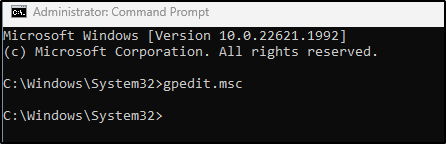
- Type “cmd” into the search bar within the Start Menu
- Right+Click “Command Prompt” and click “Run as administrator”
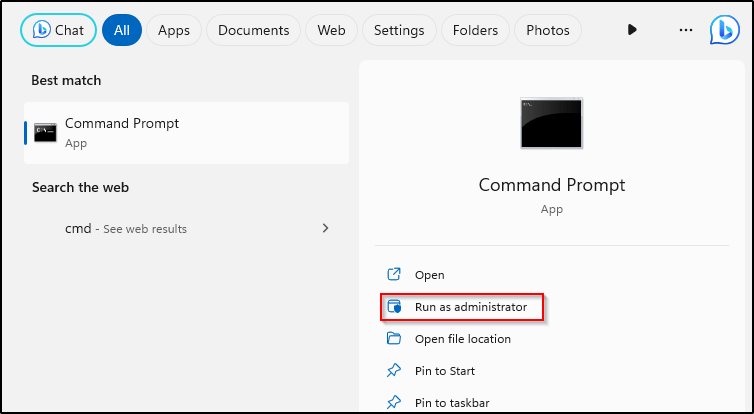
- Run the following command
gpedit.msc
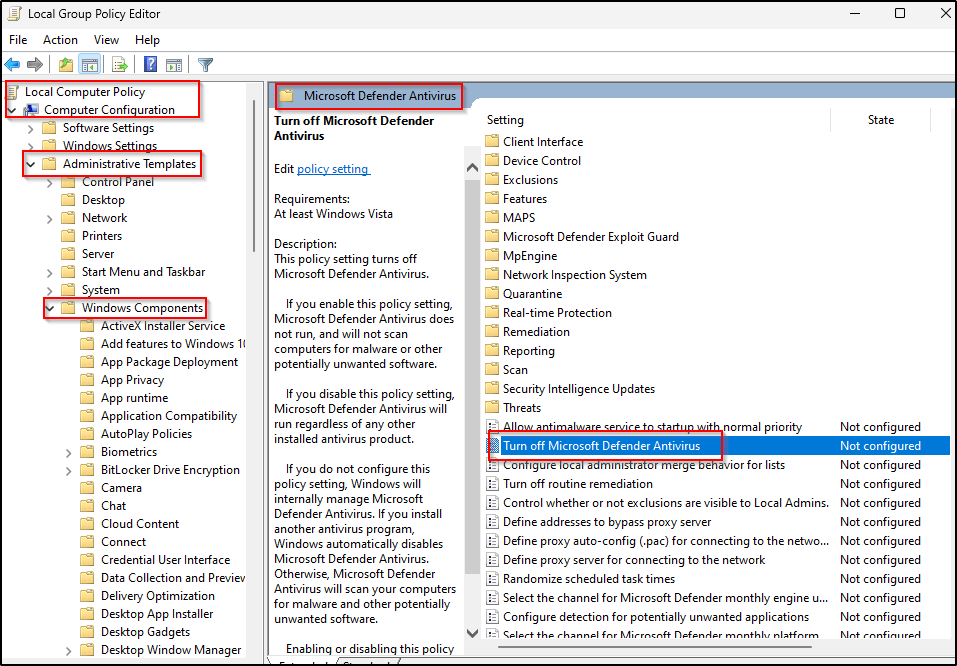
- Inside the Local Group Policy Editor
- Click Computer Configuration > Administrative Templates > Windows Components > Microsoft Defender Antivirus
- Double-click “Turn off Microsoft Defender Antivirus”
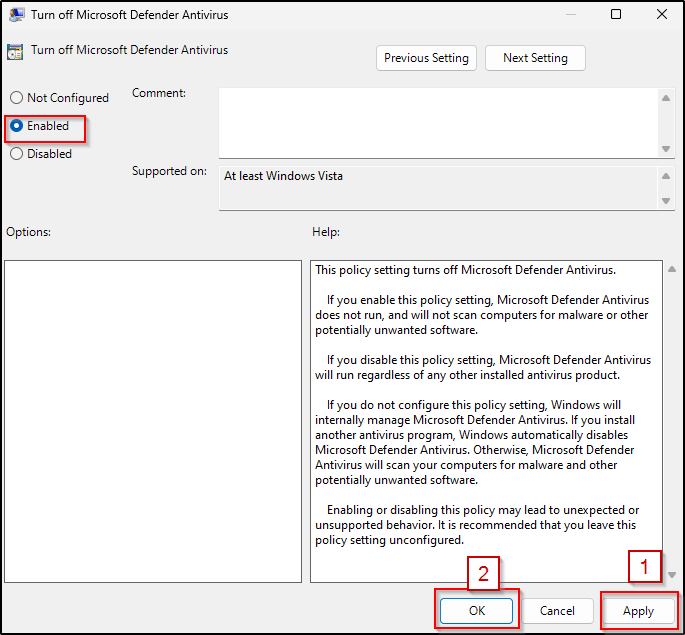
- Select “Enabled”. This setting will disable Microsoft Defender Antivirus and will not scan computers for malware or other potentially unwanted software.
- Click Apply
- Click OK
Permanently Disable Defender via Registry
- From the same administrative command prompt that was previously opened, copy/paste this command and press Enter.
REG ADD "hklm\software\policies\microsoft\windows defender" /v DisableAntiSpyware /t REG_DWORD /d 1 /f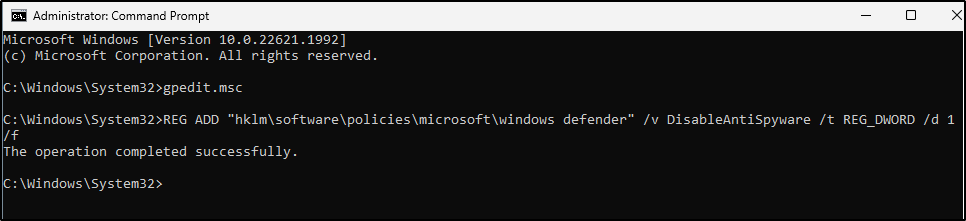
Prepare to boot into Safe Mode to disable all Defender services
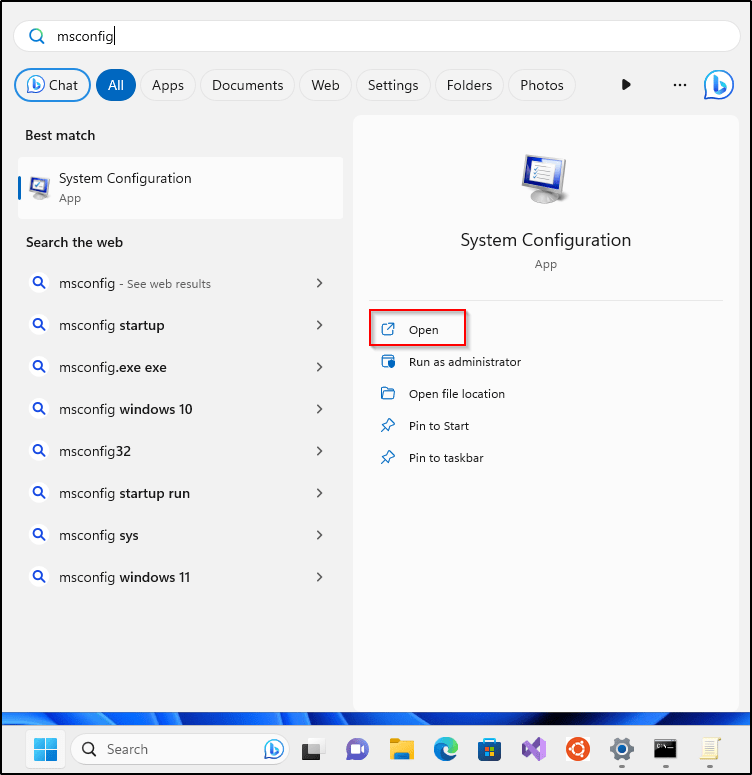
- Click the “Start” menu icon
- Type “msconfig” into the search bar within the Start Menu
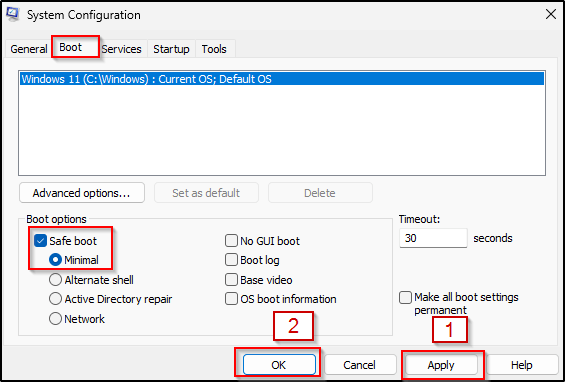
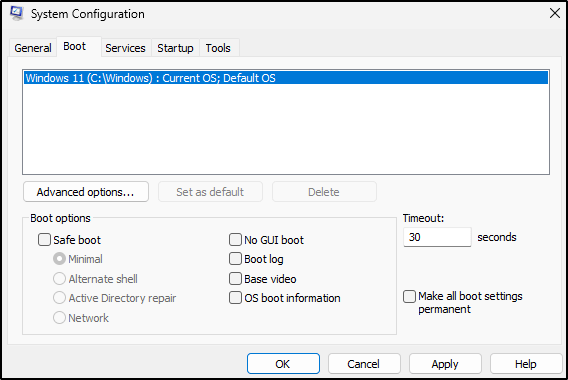
- Go to “Boot” tab and select “Boot Options”
- Check the box for “Safe boot” and “Minimal”
- Click Apply and OK
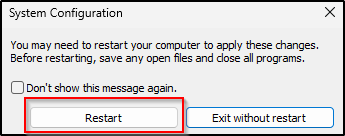
- Click Restart to start in Safe Mode
- Now, in Safe Mode, we’ll disable some services via the Registry
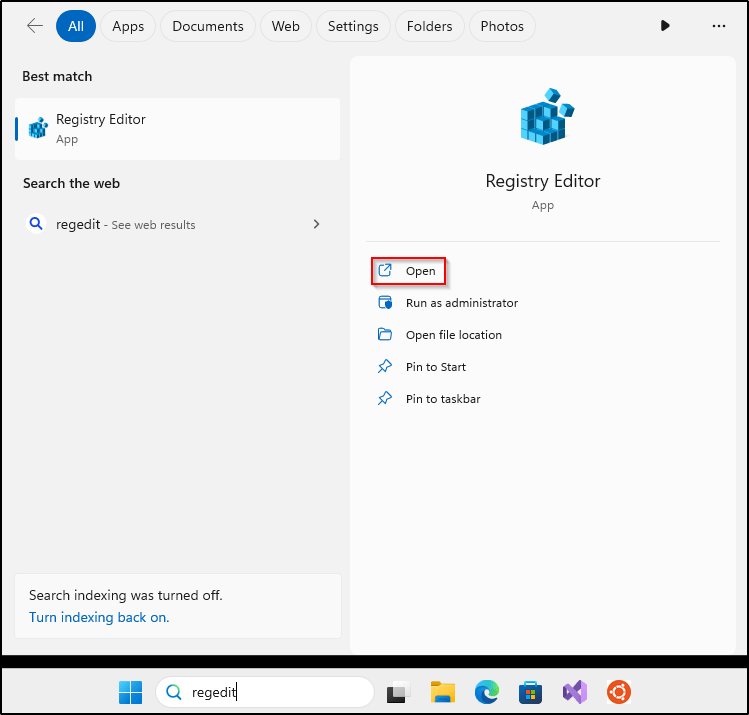
- Click the “Start” menu icon
- Type “regedit” into the search bar and hit Enter
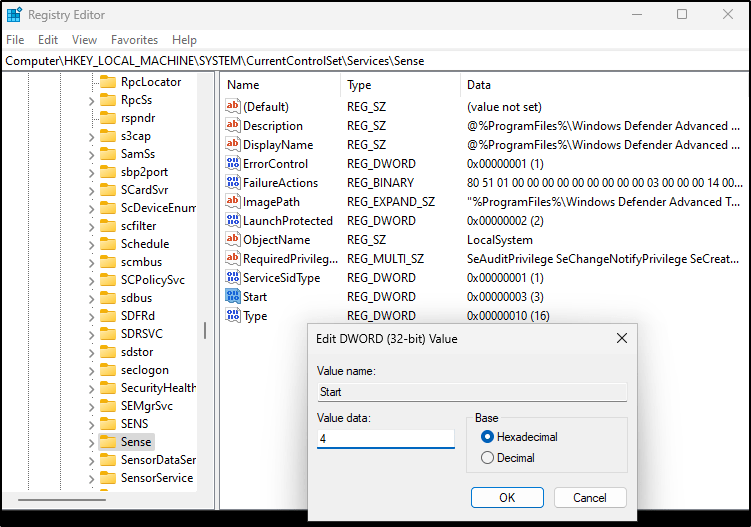
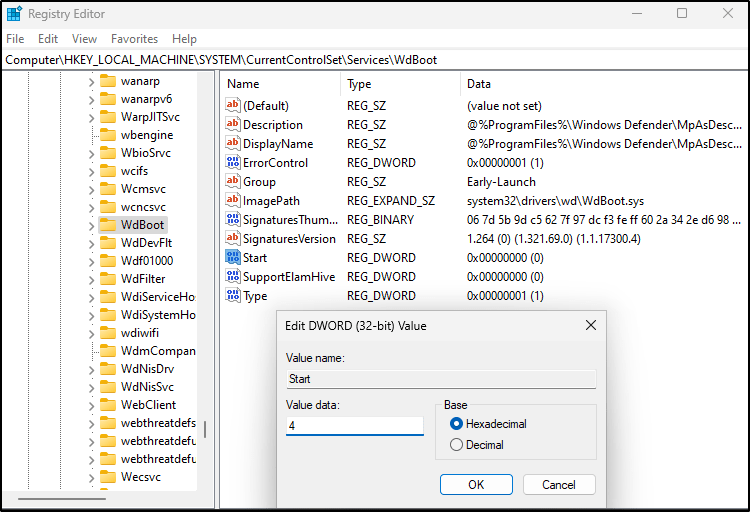
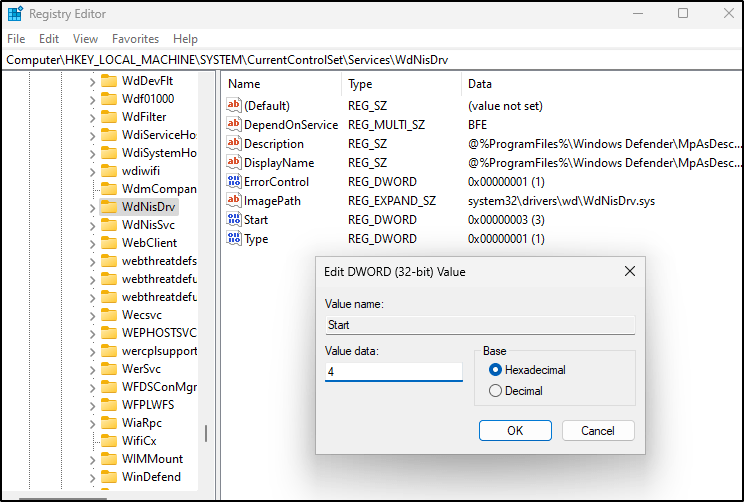
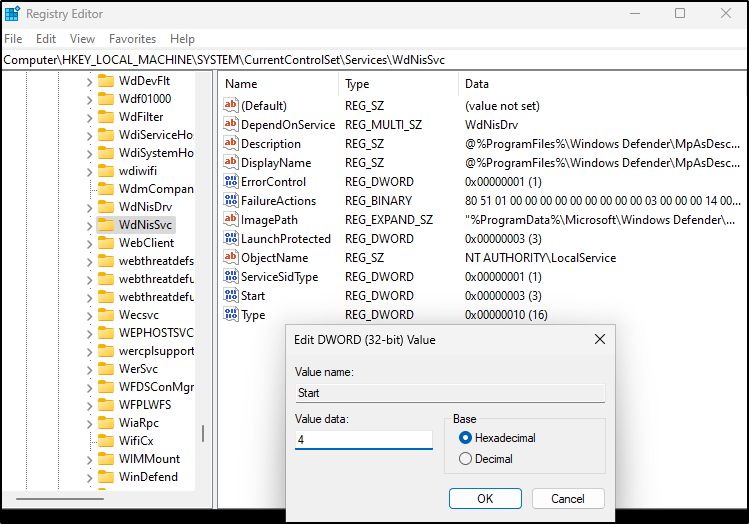
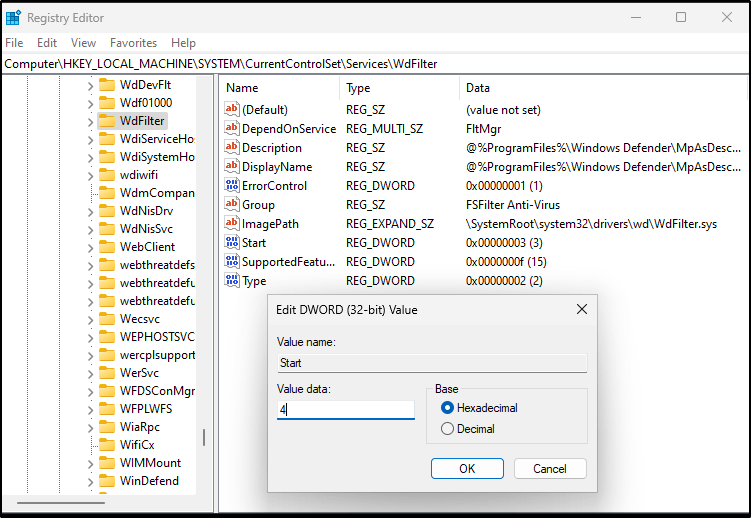
- For each of the following registry locations, you’ll need to browse to the key, find the “Start” value, and change it to 4
Computer\HKEY_LOCAL_MACHINE\SYSTEM\CurrentControlSet\Services\Sense
Computer\HKEY_LOCAL_MACHINE\SYSTEM\CurrentControlSet\Services\WdBoot
Computer\HKEY_LOCAL_MACHINE\SYSTEM\CurrentControlSet\Services\WinDefend

Computer\HKEY_LOCAL_MACHINE\SYSTEM\CurrentControlSet\Services\WdNisDrv
Computer\HKEY_LOCAL_MACHINE\SYSTEM\CurrentControlSet\Services\WdNisSvc
Computer\HKEY_LOCAL_MACHINE\SYSTEM\CurrentControlSet\Services\WdFilter
Leave Safe Mode the same way we got into it
- Click the “Start” menu icon
- type “msconfig” into the search bar within the Start Menu
- Go to “Boot” tab and select “Boot Options”
- Uncheck the box for “Safe boot”
- Click Apply and OK, then restart
System will restart into normal desktop environment, now Defender-free.
Prevent the VM from going into standby
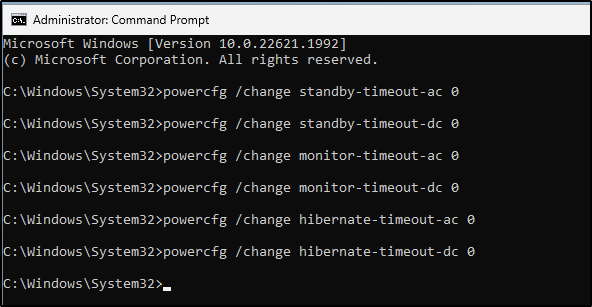
- From an administrative command prompt, let’s prevent the VM from going into sleep/standby mode during our shenanigans
powercfg /change standby-timeout-ac 0
powercfg /change standby-timeout-dc 0
powercfg /change monitor-timeout-ac 0
powercfg /change monitor-timeout-dc 0
powercfg /change hibernate-timeout-ac 0
powercfg /change hibernate-timeout-dc 0
Installing Sysmon in Windows VM
Before installing the Wazuh agent, I wanted to beef up the Windows machine’s monitoring capabilities using Sysmon. For those unfamiliar, Sysmon is part of Windows Sysinternal package that logs system activity to the Windows event log. It provides deep visibility into things like process creation, network connections, and changes to file creation time – all useful stuff for security monitoring that normally goes unlogged. After I completed THM’s Sysmon and Wazuh rooms, I decided to deploy Sysmon to start collecting this extra data that would then be shipped to my Wazuh manager. I utilized these two blogs from Wazuh to install Sysmon in a Windows environment that is configured to generate logs when a PowerShell script and Mimikatz are executed.
The installation itself was smooth sailing. I followed the standard steps to download the Sysmon zip file, extract it to C:\Windows\Temp, and make sure I had the necessary sysmon.exe and sysconfig.xml files ready to go.
To install and configure Sysmon, these are the steps I took:
- Download Sysmon with this PowerShell Script. A zip file will be downloaded to this directory
C:\Windows\Temp. Create a Temp directory if it is not found.
Invoke-WebRequest -Uri https://download.sysinternals.com/files/Sysmon.zip -OutFile C:\Windows\Temp\Sysmon.zip- The following command will unzip the zip file and create a Sysmon folder where all the binaries for the installation will be located.
Expand-Archive -LiteralPath C:\Windows\Temp\Sysmon.zip -DestinationPath C:\Windows\Temp\Sysmon
- Create an XML configuration file named sysconfig.xml in the same the folder where the Sysmon binaries are contained. In this example, I used notepad to create the configuration file.
notepad.exe sysconfig.xml- Below is the content of sysconfig.xml to generate logs every time PowerShell or mimikatz is executed.
<Sysmon schemaversion="4.10">
   <HashAlgorithms>md5</HashAlgorithms>
   <EventFiltering>
      <!--SYSMON EVENT ID 1 : PROCESS CREATION-->
      <ProcessCreate onmatch="include">
         <Image condition="contains">mimikatz.exe</Image>
	 <Image condition="contains">powershell.exe</Image>
      </ProcessCreate>
      <!--SYSMON EVENT ID 2 : FILE CREATION TIME RETROACTIVELY CHANGED IN THE FILESYSTEM-->
      <FileCreateTime onmatch="include" />
      <!--SYSMON EVENT ID 3 : NETWORK CONNECTION INITIATED-->
      <NetworkConnect onmatch="include" />
      <!--SYSMON EVENT ID 4 : RESERVED FOR SYSMON STATUS MESSAGES, THIS LINE IS INCLUDED FOR DOCUMENTATION PURPOSES ONLY-->
      <!--SYSMON EVENT ID 5 : PROCESS ENDED-->
      <ProcessTerminate onmatch="include" />
      <!--SYSMON EVENT ID 6 : DRIVER LOADED INTO KERNEL-->
      <DriverLoad onmatch="include" />
      <!--SYSMON EVENT ID 7 : DLL (IMAGE) LOADED BY PROCESS-->
      <ImageLoad onmatch="include" />
      <!--SYSMON EVENT ID 8 : REMOTE THREAD CREATED-->
      <CreateRemoteThread onmatch="include">
         <SourceImage condition="contains">mimikatz.exe</SourceImage>
      </CreateRemoteThread>
      <!--SYSMON EVENT ID 9 : RAW DISK ACCESS-->
      <RawAccessRead onmatch="include" />
      <!--SYSMON EVENT ID 10 : INTER-PROCESS ACCESS-->
      <ProcessAccess onmatch="include">
         <SourceImage condition="contains">mimikatz.exe</SourceImage>
      </ProcessAccess>
      <!--SYSMON EVENT ID 11 : FILE CREATED-->
      <FileCreate onmatch="include" />
      <!--SYSMON EVENT ID 12 & 13 & 14 : REGISTRY MODIFICATION-->
      <RegistryEvent onmatch="include" />
      <!--SYSMON EVENT ID 15 : ALTERNATE DATA STREAM CREATED-->
      <FileCreateStreamHash onmatch="include" />
      <PipeEvent onmatch="include" />
   </EventFiltering>
</Sysmon>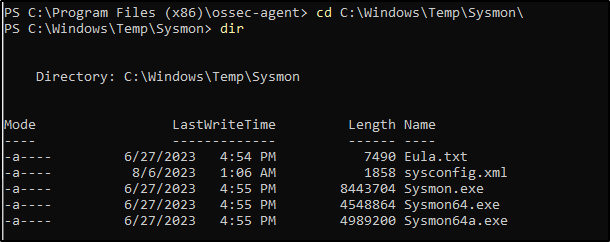
In the Sysmon folder, launch PowerShell with administrator privileges. When running the installer with, I made sure to use the -accepteula flag to agree to the end user license agreement, and -i to point to my configuration file. Within seconds Sysmon was up and running!
Sysmon64.exe -accepteula -i sysconfig.xml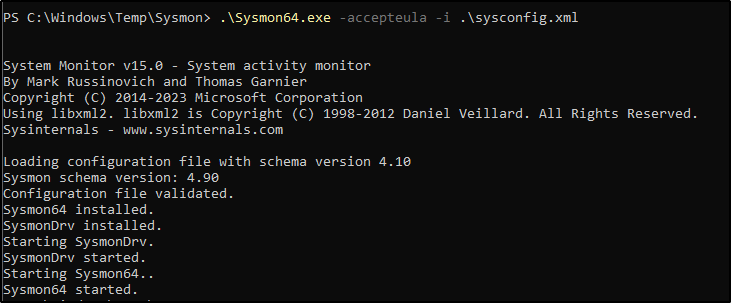
Sysmon is now installed and has deployed the configured XML file instead of the default.
Time to test if it works.
I launched a PowerShell terminal and proceeded to the Sysmon section on EventViewer (Applications and Services Logs/Microsoft/Windows/Sysmon/Operational):

Just by opening a PowerShell terminal, the event was successfully logged by Sysmon.
Installing the Windows Wazuh agent
I will go straight to the installation process as the introduction on what an agent does has already been covered in my previous posts
Installing the agents would required an administrator privileges.
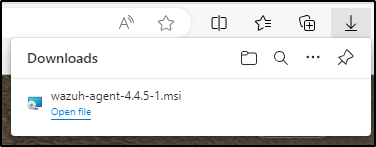
- Download the Windows installer.
- I selected graphical user interface (GUI) for the installation method.
- Run the Windows installer and simply follow the steps in the installation wizard. I used default answers in the prompts.
- Clicked Install.
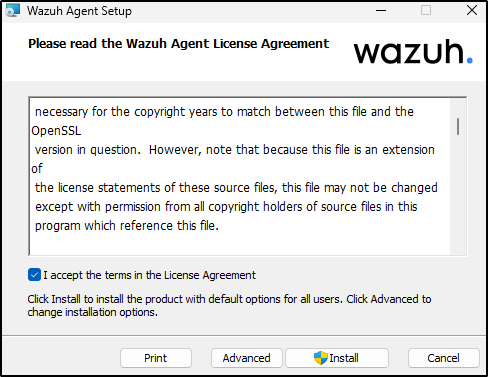
- Selected “yes” for any prompts.
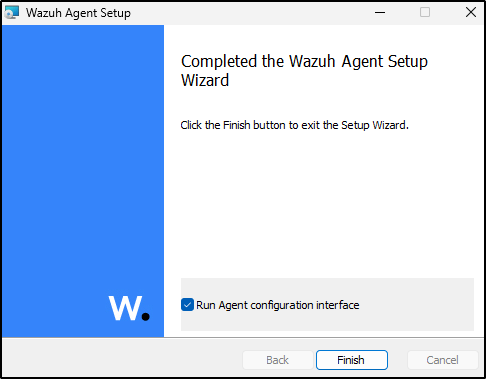
I expected a GUI to appear on the Window but nothing surfaced. It is supposed to be used for configuration, opening the log file, and starting or stopping the service. I proceeded anyway to the next step of registering and configuring the agent to communicate with the Wazuh server. Agent files are stored in C:\Program Files (x86)\ossec-agent after the installation.
Enrollment methods
There are two options for enrolling agents with the Wazuh manager.
- Enrollment via agent configuration: Wazuh recommends this enrollment method. After the agent is configured with the manager’s IP address, it will automatically retrieve the key from the manager and import it. This will enable the agent to connect to the manager and start sending data..
- Enrollment via manager API: This is a more manual method of enrolling the agent. The user can request the key for an agent from the manager API. Once the key is received, the user manually imports it to the agent. This allows the agent to communicate with the manager and start sending data.
I chose number 1 for enrolling the agent in my Windows VM.
Enrollment via agent configuration in a Windows endpoint
The agent, in this method, is automatically enrolled after the Wazuh manager IP address has been configured.
The Wazuh agent installation directory depends on the architecture of the host:
C:\Program Files (x86)\ossec-agentfor 64-bit systems.C:\Program Files\ossec-agentfor 32-bit systems.
The following are the steps for this method:
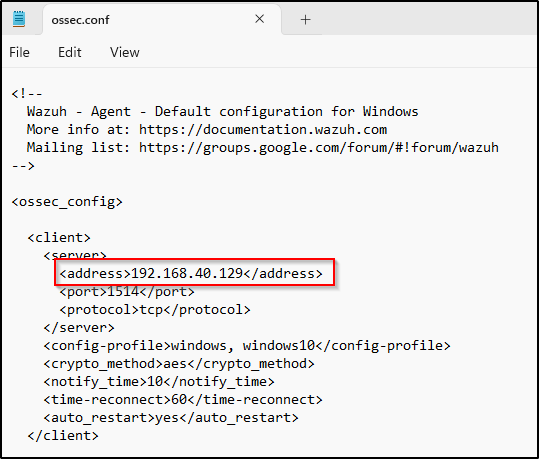
1. I edited the Wazuh agent configuration file ossec.conf in the installation directory as an Administrator. I am using 64-bit architecture so the config file is found at C:\Program Files (x86)\ossec-agent\ossec.conf
Include the Wazuh manager IP address or DNS name in the <client><server><address> section:
<client>
  <server>
    <address>MANAGER_IP</address>
    ...
  </server>
</client>
I used notepad to open and edit the configuration file.

My Windows VM agent is now allowed to connect to the Wazuh manager and automatically request a key.
I could have also named and added the agent into the windows group which I created a while ago by adding an enrollment parameters in the <client><enrollment> section.
<client>
    ...
    <enrollment>
        <agent_name>EXAMPLE_NAME</agent_name>
        <groups>GROUP1,GROUP2,GROUP3</groups>
    ...
    </enrollment>
</client>
I added the windows agent later using the dashboard.
More info about enrollment parameters can be found here.
2. With that complete, I restarted the Wazuh agent service for the changes to take effect.
Restart-Service -Name wazuh
Opening up the dashboard, I could see the Windows agent was successfully enrolled and connected!

Configure Wazuh agent to monitor Sysmon Events
Using the below configuration, Sysmon events are checked and retrieved by Wazuh. After the Wazuh manager has collected the events, it uses an internal decoder to translate them into JSON format. C:\Program Files (x86)\ossec-agent\ossec.conf
<localfile>
  <location>Microsoft-Windows-Sysmon/Operational</location>
  <log_format>eventchannel</log_format>
</localfile>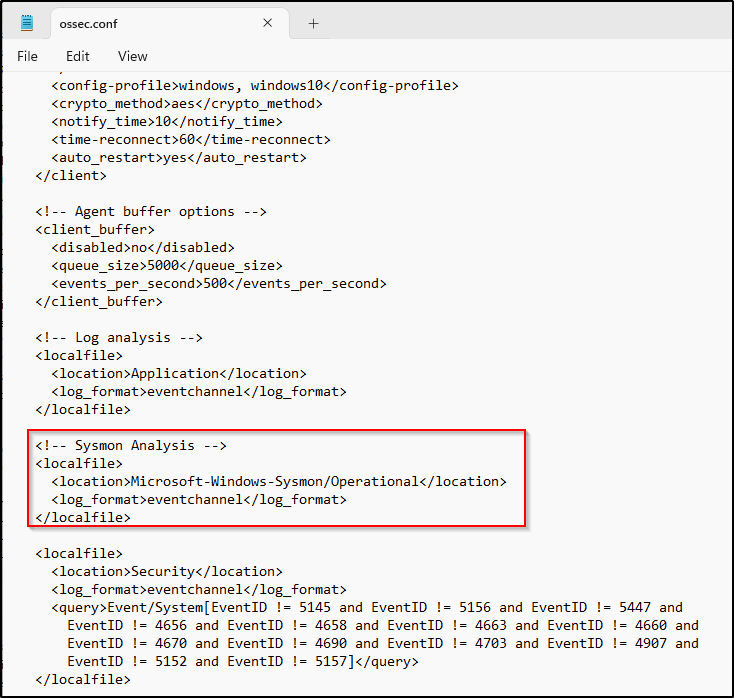
I restarted the agent to apply the changes.
Restart-Service -Name wazuhConfigure Wazuh Manager to Detect Powershell and Mimikatz Execution
To generate alerts when suspicious events occur, I needed to create custom rules in the Wazuh manager’s local_rules.xml file. The rules I added look specifically for PowerShell or Mimikatz being executed based on Sysmon logs. Now when Sysmon detects either of those processes running, it will log an event that matches my custom rule and triggers an alert in Wazuh.
The following rules would be a “child” rule of the Sysmon ruleset provided by Wazuh. It has been edited to grab the Sysmon “Event number 1” when the Image field is “powershell” and a level of 12, which is pretty high, which means this event is very important from a security perspective. I also made sure that the IDs are unique.
In addition the events to be monitored in this case are events ID 1 (Process creation), ID 8 (Remote thread creation), and ID 10 (Process access) to detect mimikatz processes. I used the generic Sysmon rules included in the Wazuh ruleset as the parents of the custom rules created for this experimentation.
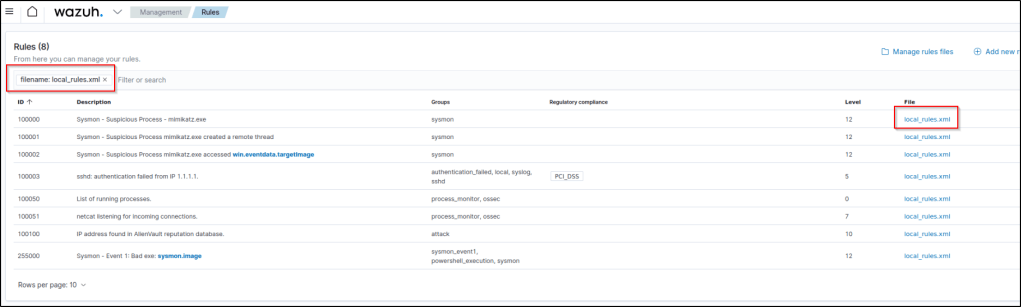
The local_rules.xml can also be edited in the dashboard by going the the Management directory then select Rules. Filter by filename then type the name of the file which is local_rules.xml.
I added the following ruleset in the file. The “field name” was edited based on my research in Wazuh’s slack channel.
<group name="sysmon">
   <rule id="255000" level="12">
     <if_group>sysmon_event1</if_group>
     <field name="win.eventdata.image" type="pcre2">\\powershell\.exe$|\.ps1$|\.ps2$</field>
     <description>Sysmon - Event 1: Bad exe: $(sysmon.image)</description>
     <group>sysmon_event1,powershell_execution,</group>
   </rule>

   <rule id="100000" level="12">
     <if_group>sysmon_event1</if_group>
     <field name="win.eventdata.image">mimikatz.exe</field>
     <description>Sysmon - Suspicious Process - mimikatz.exe</description>
   </rule>

   <rule id="100001" level="12">
     <if_group>sysmon_event8</if_group>
     <field name="win.eventdata.sourceImage">mimikatz.exe</field>
     <description>Sysmon - Suspicious Process mimikatz.exe created a remote thread</description>
   </rule>

   <rule id="100002" level="12">
     <if_group>sysmon_event_10</if_group>
     <field name="win.eventdata.sourceImage">mimikatz.exe</field>
     <description>Sysmon - Suspicious Process mimikatz.exe accessed $(win.eventdata.targetImage)</description>
   </rule>
</group>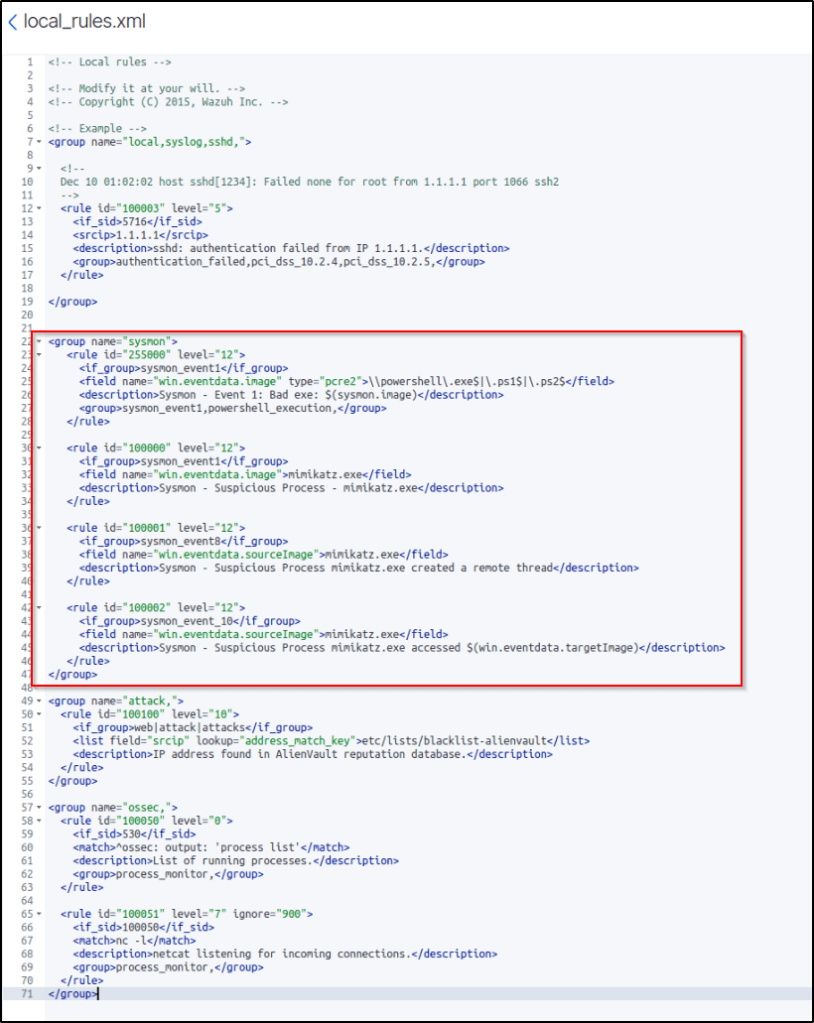
After adding my custom rules to the local_rules.xml file, I restarted the manager. Now Wazuh was tailored to flag suspicious Sysmon events based on my threat model. The moment a PowerShell script or Mimikatz runs, I’ll know about it.
To test if an alert will be generated, I did the following.
I opened PowerShell as Administrator and tried to run PowerView, but executing scripts is disabled, so I executed Set-ExecutionPolicy Unrestricted so I can run the script.
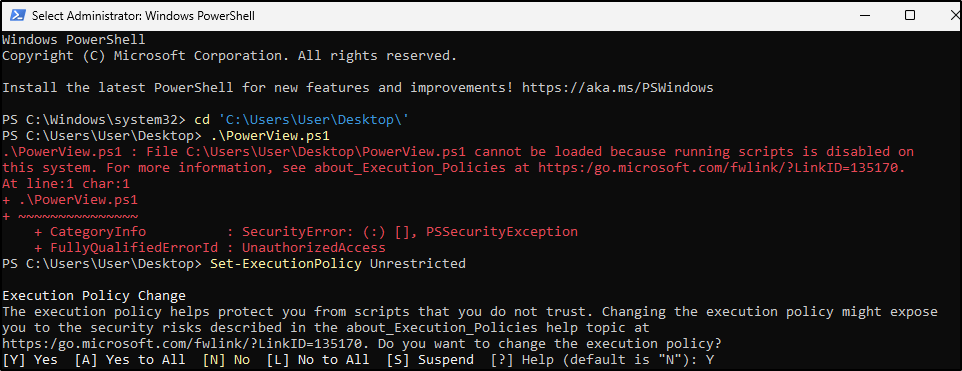
I run the script again.

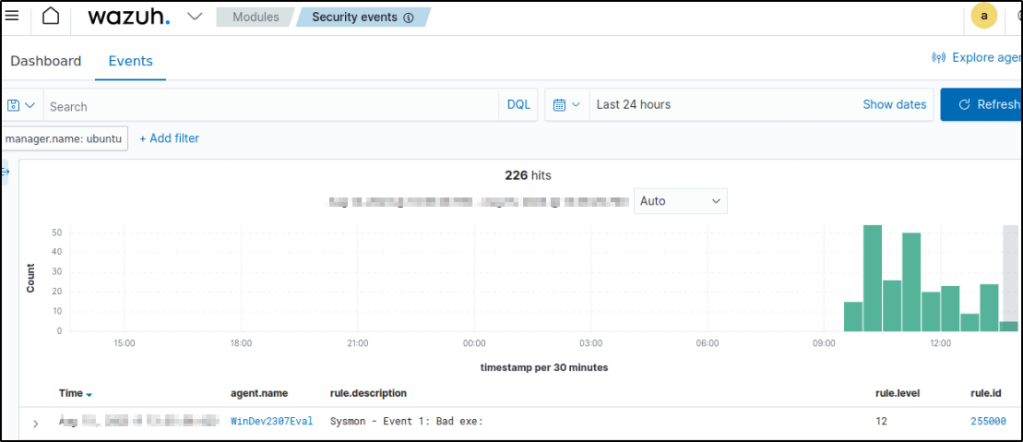
Heading back to the my server, I can see that the rule and the configuration worked.
Adding windows VM to the windows group
In my previous post, I created two groups for grouping my devices.
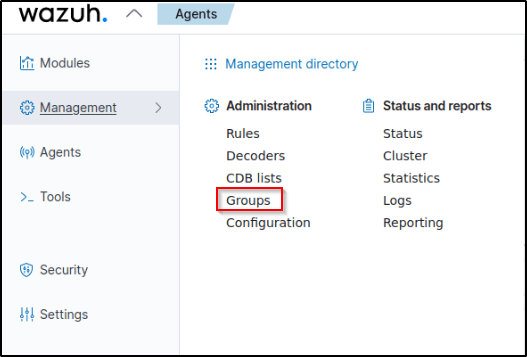
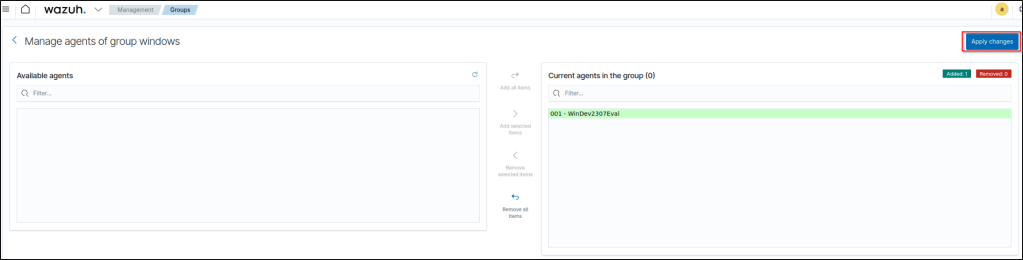
To add the windows VM to the windows group, I click on the Management directory and selected “Groups”
I then selected my windows VM and click the “Manage agents” tab.


From the left pane, I selected my windows VM and selected “Add selected items”.
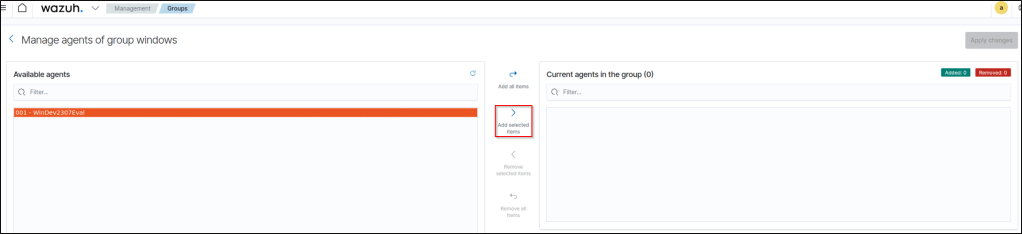
I then applied the changes and my windows VM is now added to the windows group.
I deleted my windows VM from the default group using the same process.
Installing agent on Ubuntu
Since running three virtual machines crashes my host machine, I suspended the Windows VM and then installed the Wazuh agent in the ubuntuendpoint.
Before installing the agent, I wanted to make sure my Ubuntu machine was ready. I fired up the terminal and checked which version of Ubuntu I was running:
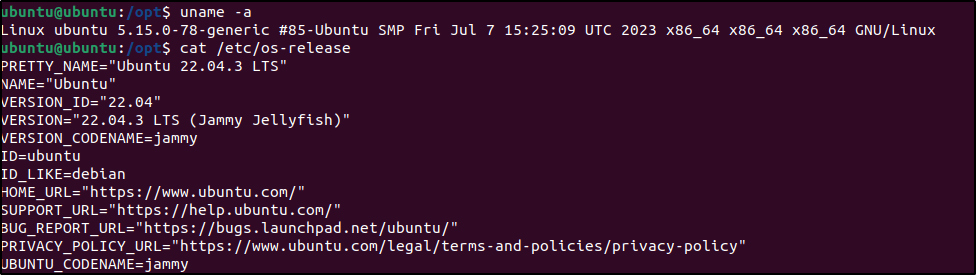
The output showed I was good to go with Ubuntu 22.04 LTS!
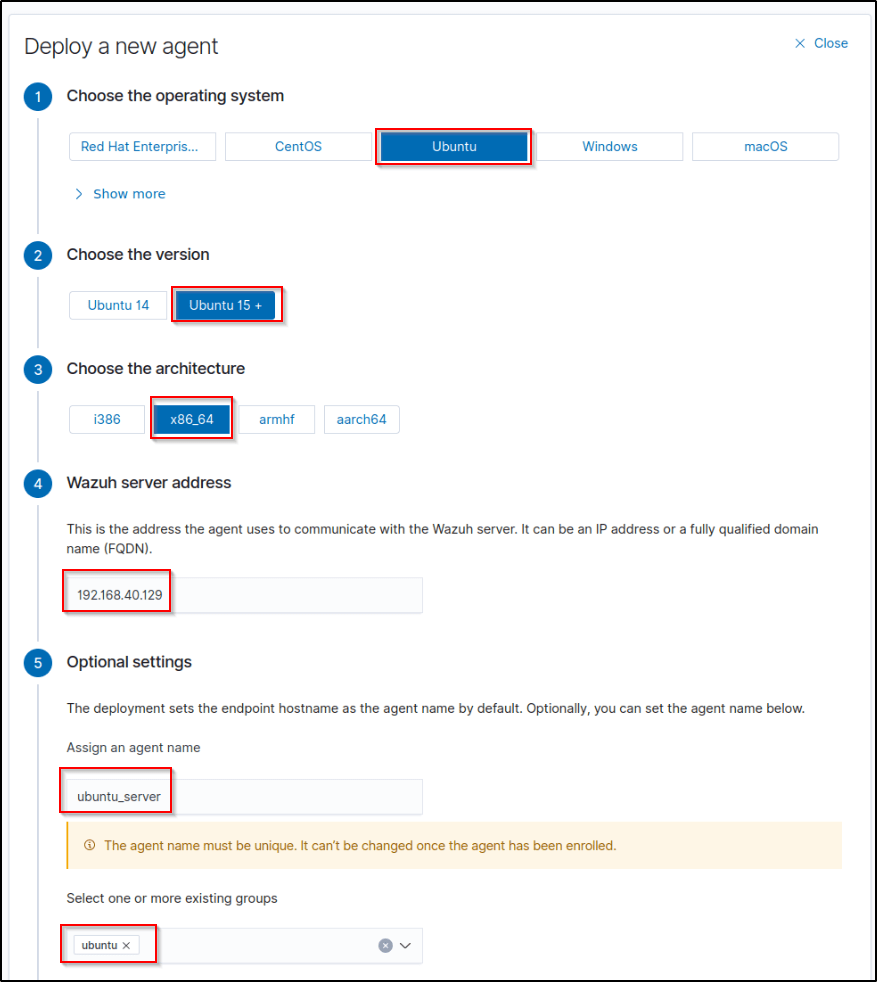
In the Wazuh dashboard, I navigated to the Agents tab and clicked “Add new agent”.

It’s vital to select the right details for the agent like the right operating system, OS version, and architecture. I made sure that the IP is the right server address.
I made sure to give the agent a unique agent_name. An issue I faced in this step was I named my agent initially as “ubuntu” and I couldn’t get any connection from my server and I had to go to the documentation and search for what is causing the error. So by simply naming it as “ubuntu_server”, I finally got a connection.
Once the correct configurations are selected, I copied the commands in step 6 and ran them in the terminal of my Ubuntu endpoint.
Additional commands were provided to start the Wazuh agent service on Ubuntu. This completed the deployment.


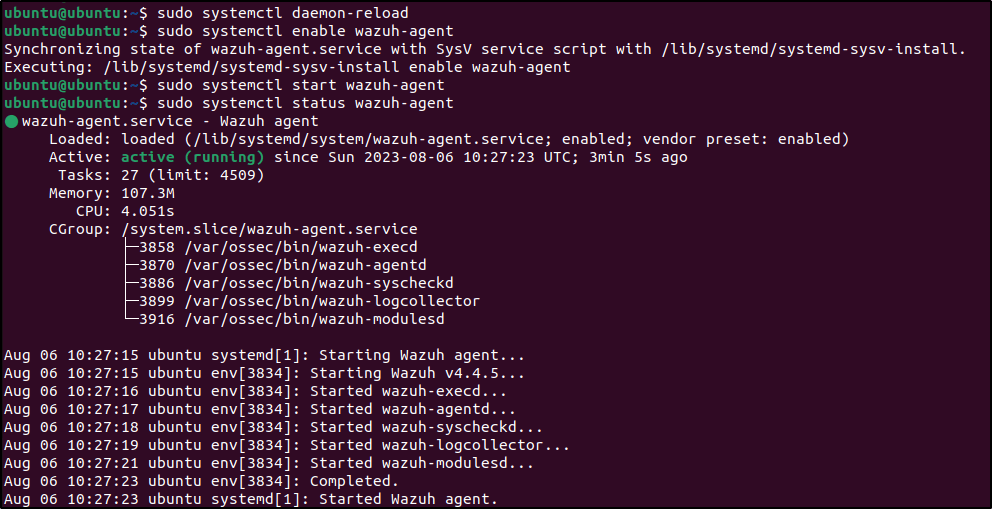
The logs can be viewed in /var/ossec/logs/ossec. The log should look like this for a successful deployment
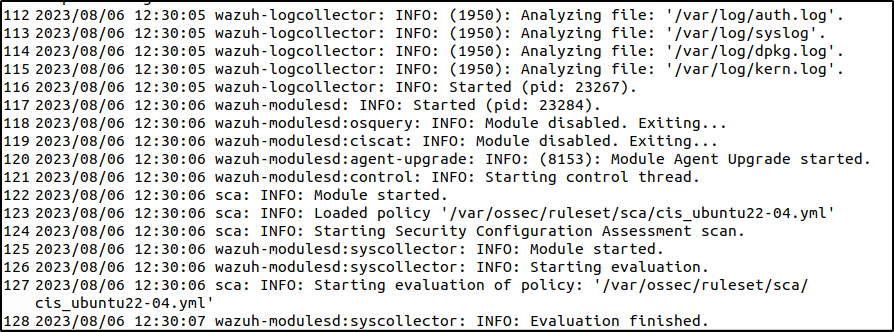
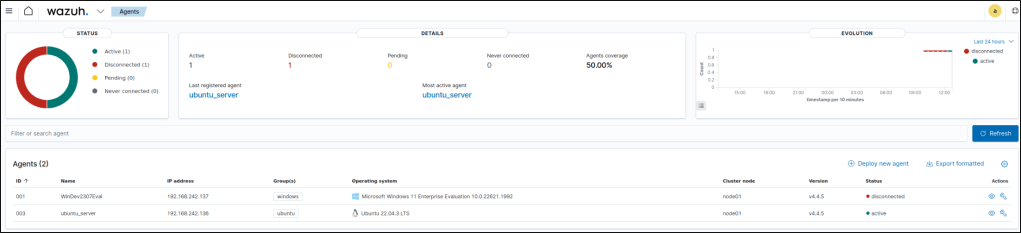
I was able to confirm the successful deployment by restarting and checking the agent list in the dashboard. The new Ubuntu agent appeared with the status Active.
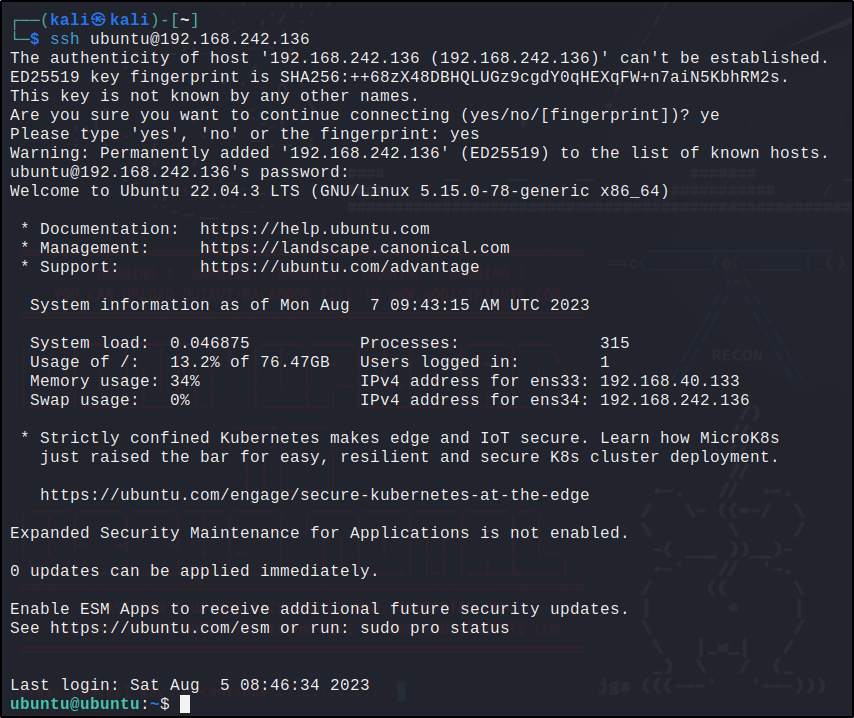
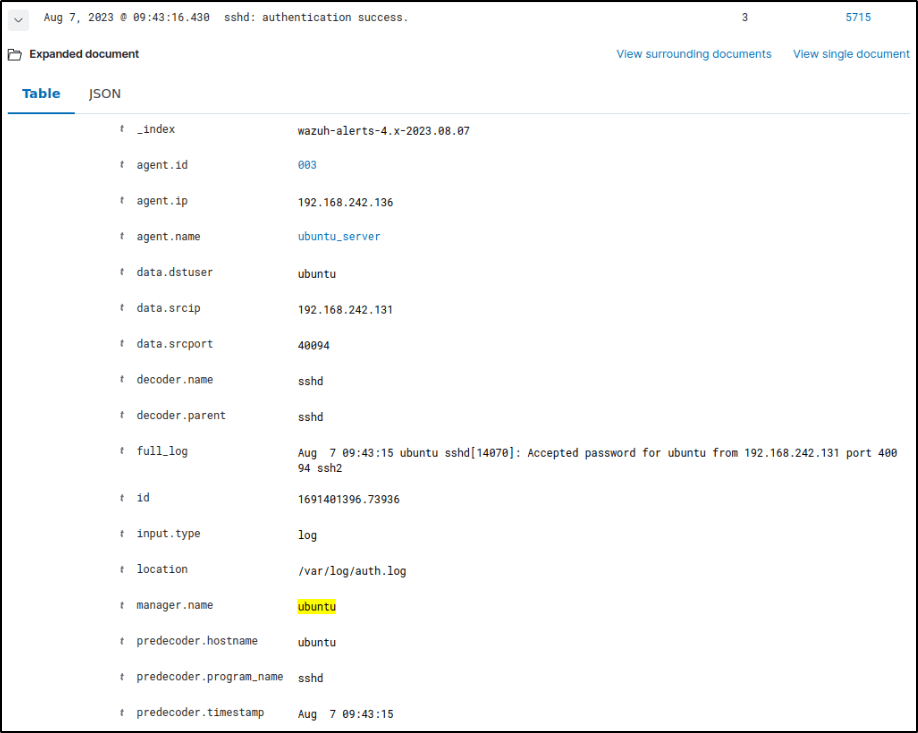
To test if alerts are forwarded to the server, I performed an SSH connection from my attacker machine.
In Security events section of the dashboard, the SSH connection was forwarded to the Wazuh server.
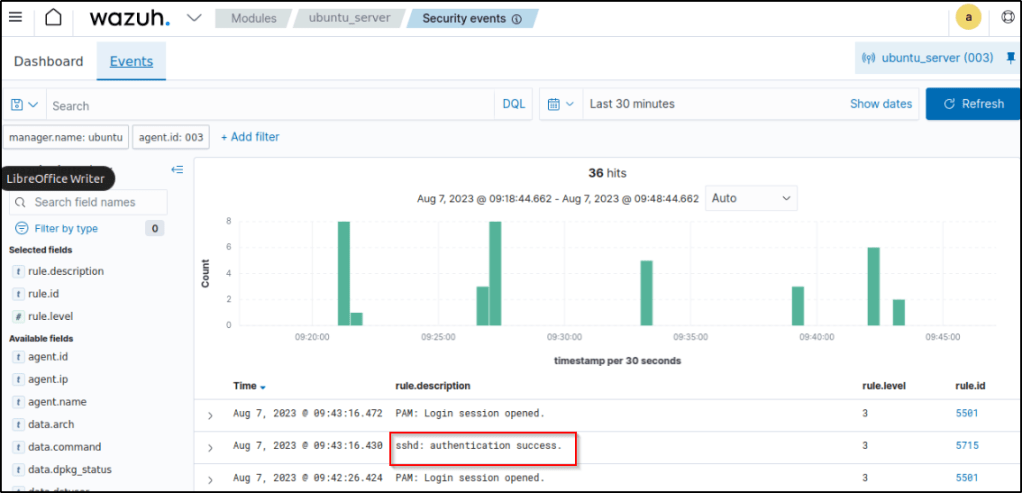
If I expand the alert, I can see detailed information like the agent IP address, IP address of the attacker (data.srcip), the decoder used, log location, timestamp, etc.
My Ubuntu endpoint is now ready for testing.
Conclusion
In this post, I installed the Wazuh agent on both Windows and Ubuntu endpoints and integrated Sysmon to boost monitoring on the windows side. I have also performed a simple SSH connection to test the connectivity between the agent and the server. The agents are reporting data back to my Wazuh server, giving me visibility into activities across my test environment. I am now ready to begin putting the capabilities of Wazuh like file integrity monitoring and threat detection into action
With my Wazuh environment now fully up and running, the remaining series will demonstrate how to take advantage of Wazuh’s powerful capabilities for security monitoring.
Until next time. Thanks for reading 🙂

Leave a comment